Keeping your house insect-free without compromising fresh air and natural sunlight has now become easy. Velcro nets for windows serve as the perfect, practical, and cost-saving application for every setup. Easy installation, removal, and maintenance are fa ew reasons that have made Velcro nets the preferred solution in a modern home.
This stepwise installation guide will walk you through an easy installation process, so you can protect your home with the least amount of effort.
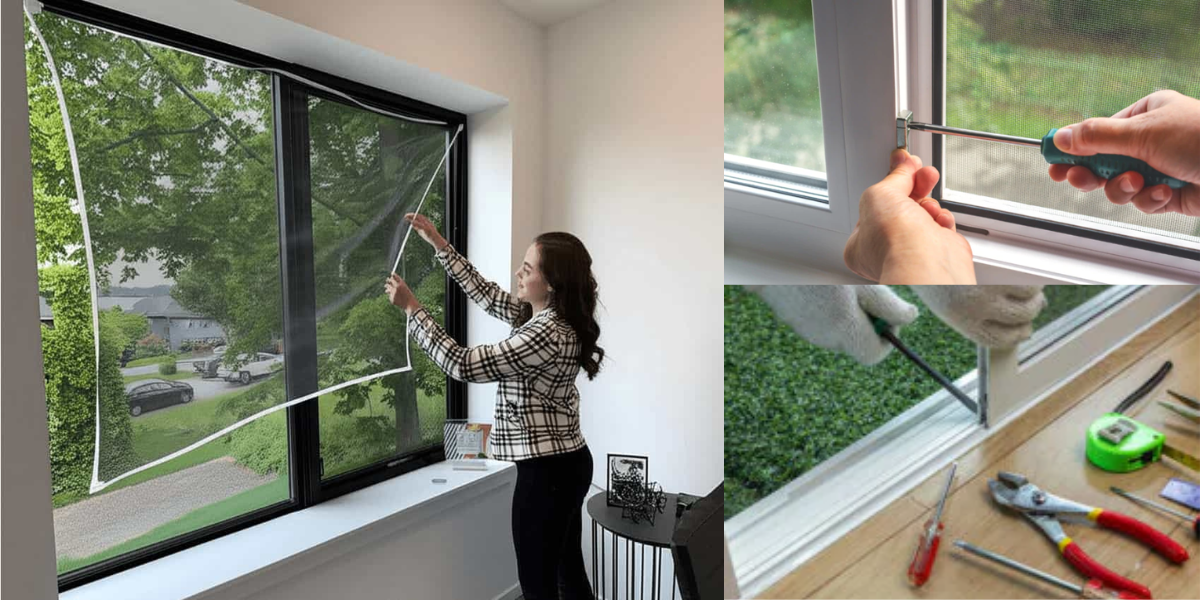
Why Choose Velcro Nets for Windows?
Before moving on with the process, let us quickly look at why Velcro nets for windows have become so popular:
- The installation and removal process is a breeze.
- They are budget-friendly.
- No holes are drilled, thereby keeping the window frames intact.
- Washable and reusable
- Serve as an excellent protection against mosquitoes and flies
At Signature Netting Systems, we offer top-quality sets of Velcro nets that fit the exact dimensions of your windows and match your decor.
Step 1: Gather the Required Materials
To consider this most basic stage, it will need to gather the following materials:
- A Velcro roll of about 1-inch width (hook and loop strips)
- A good net (preferably fibreglass or polyester mesh)
- A pair of scissors
- A measuring tape
- A marker or pencil
- A clean cloth for wiping
- A good adhesive (in case the one with Velcro is not enough)
An utmost key factor is for all items to be clean and dust-free, thus assuring smooth installation.
Step 2: Measure Your Window Frame
Set the measuring tape along with the width and height of the window to install the net.
In all the calculations, add an extra inch for perfect coverage.
Note down the measurements to prevent any errors while cutting the mesh.
Step 3: Cut the Velcro and Net
Using your recorded measurements:
- Cut the Velcro strips according to the size for each side of the window frame
- Cut the insect net slightly larger than the frame size
Double-check the sizes before you proceed.
Step 4: Clean the Surface Area
Now, clean the window frame edges with a dry cloth.
This allows the adhesive to bond strongly and last longer.
Make sure the frame is dry before proceeding to the next step.
Step 5: Stick the Velcro Strips
Remove the protective backing from the Velcro strips.
- Stick the hook half to the window frame
- Press firmly for a few seconds
- Make sure it is well aligned and not stretched
If the adhesive is not strong enough, apply additional glue or tape for better hold.
Step 6: Attach the Net to the Velcro
Lay the net flat and line it up with the Velcro.
- Press the mesh lightly onto the hooked Velcro
- Smooth out any wrinkles or folds
- Trim any excess net if needed
Your Velcro net for windows is now firmly installed and ready to be used.
Step 7: Test and Re-adjust if Needed
- Test the window by opening and closing it to make sure everything is working fine.
- Takes out the net easily for cleaning or when not needed.
- Put it back on by just pressing on it—very convenient and hassle-free!
Maintenance Tips
With proper maintenance, your Velcro netting can stay in tip-top shape:
- Take off any dust or dirt from the mesh using a soft brush or vacuum.
- Wash them with mild soap and ensure they’re thoroughly dry before reattachment.
- If they have any loose edges, press them back on.
With care, a single net will last for years.
Final Thoughts
Window-style Velcro netting installation is the easiest among DIY projects yet gives lasting comfort and security. Signature Netting Systems offer high-quality custom interior nets.
So, if you want to add layers of protection without messing up your view, then Velcro nets are for you.
Breathe easy. Live comfortably. Stay protected—naturally.